Choosing the Right Seeds: How To Plant Flowers From Seeds

How to plant flowers from seeds – Selecting the perfect flower seeds is paramount to a successful and vibrant garden. Consideration of several factors ensures your chosen blooms thrive and bring joy to your space. This process, while seemingly simple, requires understanding your environment and the specific needs of different plant species. The rewards, however, are well worth the effort.
Popular Flower Seeds for Beginners
A wise starting point for novice gardeners is to choose flowers known for their ease of cultivation. The following list categorizes popular choices based on their bloom time, offering a diverse range of colors and textures to suit various preferences.
- Spring Bloomers: Pansies (known for their vibrant colors and cold hardiness), Calendula (bright, cheerful blooms that attract pollinators), and Sweet Alyssum (a low-growing groundcover with a delicate fragrance).
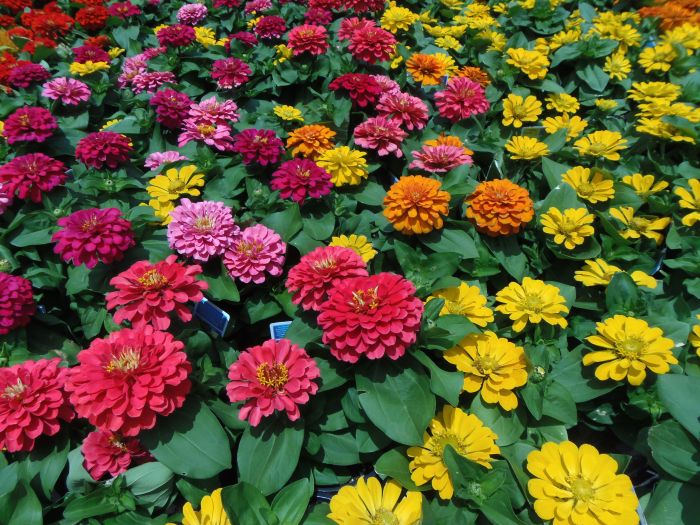
- Summer Bloomers: Zinnias (available in a wide array of colors and sizes, relatively low-maintenance), Cosmos (easy to grow from seed, produces abundant blooms), and Sunflowers (iconic tall plants that attract birds and produce edible seeds).
- Fall Bloomers: Asters (dazzling late-season blooms, attracting butterflies), Marigolds (known for their pest-repelling properties and long bloom time), and Ornamental Kale (colorful foliage plant that adds winter interest).
Factors to Consider When Selecting Seeds
Successful seed selection hinges on understanding your garden’s conditions. Climate, sunlight, and soil type are crucial factors influencing plant health and flowering success. Matching your seed choices to these conditions maximizes your chances of a beautiful garden.
- Climate Zone: Understanding your USDA Plant Hardiness Zone helps you choose seeds that can tolerate your region’s average minimum winter temperatures. Choosing plants suited to your zone prevents unnecessary losses due to frost or extreme cold.
- Sunlight Requirements: Flowers have varying sunlight needs, ranging from full sun (at least six hours of direct sunlight daily) to partial shade (three to six hours) or full shade (less than three hours). Matching the sunlight exposure in your garden to the plant’s needs is vital.
- Soil Type: Different flowers thrive in different soil types – some prefer well-drained sandy soil, while others prefer rich, loamy soil. Testing your soil pH and adjusting it accordingly can significantly impact plant health.
Seed Starting Methods: Direct Sowing vs. Starting Indoors
Two primary methods exist for starting flowers from seeds: direct sowing and starting indoors. Each approach has its advantages and disadvantages, influencing the timing and success of your planting.
- Direct Sowing: This involves planting seeds directly into the garden bed. It’s simple but suitable only for fast-germinating varieties and warmer climates. Direct sowing saves time and avoids the transplanting shock that can harm delicate seedlings.
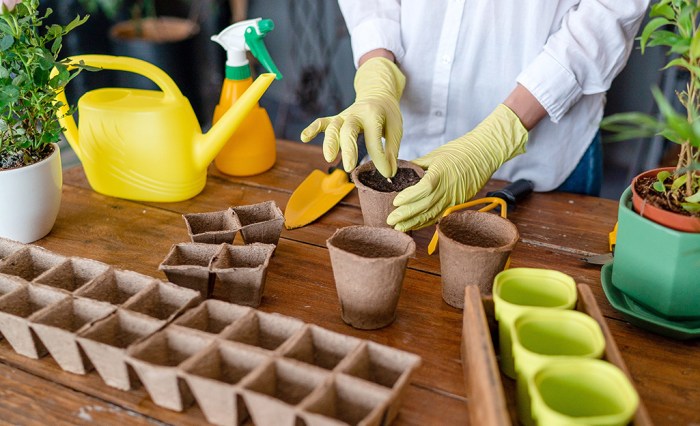
- Starting Indoors: This method involves starting seeds indoors in seed trays or pots several weeks before the last expected frost. It offers more control over the germination process, ideal for slow-germinating varieties or extending the growing season.
Germination Times and Mature Plant Sizes
The following table compares the germination times and mature plant sizes of five common flower types. This information is crucial for planning your garden layout and managing space effectively. Note that these are approximate values and can vary based on growing conditions.
| Flower Type | Germination Time (Days) | Mature Height (Inches) | Mature Width (Inches) |
|---|---|---|---|
| Zinnia | 7-14 | 12-36 | 12-18 |
| Cosmos | 7-21 | 24-48 | 12-18 |
| Sunflower | 7-14 | 36-96+ | 12-24 |
| Marigold | 7-10 | 6-36 | 6-12 |
| Nasturtium | 7-14 | 6-12 | 12-18 |
Seed Germination and Care

The successful sprouting of your flower seeds, a process known as germination, is a crucial step in cultivating a vibrant garden. Understanding the environmental needs of your seeds and providing consistent care significantly increases your chances of a bountiful bloom. Careful attention to temperature, humidity, and watering techniques will nurture your seeds from tiny specks to thriving seedlings.Ideal Temperature and Humidity for GerminationThe ideal temperature and humidity levels for seed germination vary depending on the specific flower species.
However, generally, most flower seeds prefer a warm and moist environment. A temperature range between 65°F and 75°F (18°C and 24°C) is often optimal for many common garden flowers. Maintaining consistent humidity is equally important; a slightly humid environment, achieved through misting or placing the seed tray in a humidity dome, encourages successful germination. For example, seeds of impatiens, known for their delicate nature, thrive in consistently humid conditions, while sunflowers, more resilient, can tolerate slightly drier conditions.
Always refer to the seed packet for species-specific recommendations.Consistent Watering and Avoiding OverwateringConsistent moisture is vital for seed germination. The soil should be kept damp but not waterlogged. Overwatering can lead to seed rot and fungal diseases, preventing germination. Underwatering, on the other hand, will leave the seeds too dry to sprout. The best approach is to water gently from the bottom, using a tray filled with water, allowing the soil to absorb moisture gradually.
This method prevents disturbance to the delicate seeds. Regularly check the moisture level of the soil by touching it; it should feel moist but not soggy.Signs of Successful Germination and Addressing Germination FailureSuccessful germination is indicated by the emergence of a small sprout, the radicle, from the seed. This is usually followed by the appearance of the cotyledons, the first leaves of the seedling.
If seeds fail to germinate, several factors could be at play: improper temperature, insufficient moisture, poor seed quality, or incorrect planting depth. If germination is unsuccessful, examine the conditions, check the seed viability (test a few seeds in a damp paper towel), and ensure proper planting depth. Rectifying these issues can improve germination rates in subsequent attempts.
Sometimes, a small percentage of seed failure is simply part of the natural process.Stages of Flower Seed GerminationImagine a seed, initially dormant. First, the seed absorbs water, swelling and softening the seed coat. Next, the radicle, a small root, emerges from the seed, anchoring the seedling and absorbing nutrients. Then, the plumule, a tiny shoot, pushes upward towards the light, developing into the first leaves (cotyledons).
Successful propagation of flowers from seeds necessitates careful consideration of species-specific requirements. For autumnal blooms, a suitable selection of plants can be found by consulting resources such as this guide on fall flowers to plant in pots , which offers valuable insights into appropriate species and cultivation techniques. Following seed sowing, consistent moisture and appropriate light exposure are crucial for optimal germination and subsequent growth.
Finally, the true leaves appear, marking the transition to a seedling stage. This visual progression demonstrates the remarkable transformation from a seemingly inert seed to a vibrant young plant.
Transplanting Seedlings (if applicable)

Successfully transplanting seedlings requires careful preparation and gentle handling to ensure their survival and continued growth. The process involves gradually acclimating the seedlings to outdoor conditions (hardening off), choosing the optimal time for transplanting based on weather, and employing proper techniques to minimize root disturbance. This ensures a smooth transition from the protected environment of a seed tray or pot to the garden bed.
Hardening Off Seedlings, How to plant flowers from seeds
Hardening off is a crucial step before transplanting seedlings outdoors. It gradually accustoms the delicate seedlings to the harsher conditions of the open air, such as wind, sun, and temperature fluctuations. This process reduces transplant shock and increases the chances of survival. The hardening-off period typically lasts for one to two weeks. Start by placing the seedlings in a sheltered location for a few hours each day, gradually increasing the exposure time over several days.
Finally, leave them outdoors overnight before transplanting. Protecting seedlings from strong winds and direct sunlight during this process is vital. A shaded area or using shade cloth is recommended.
Optimal Transplanting Time
The best time to transplant seedlings is after the last expected frost and when the soil temperature has warmed sufficiently. This generally falls in spring or early summer, depending on the climate and specific plant species. For example, in a temperate climate, this might be around late May or June, while in warmer climates, it could be earlier.
Consider the specific needs of your plants; some are more tolerant of cooler temperatures than others. Checking the weather forecast is crucial; avoid transplanting on days with extreme temperatures or heavy rain.
Proper Transplanting Technique
Careful handling during transplanting is essential to prevent root damage. Gently loosen the seedling from its container or seed tray, avoiding pulling on the stem. If using a container, gently squeeze the sides to loosen the root ball before carefully removing the seedling. Plant the seedling at the same depth it was growing in its container, ensuring the root ball is completely covered with soil.
Firm the soil gently around the base of the plant to ensure good contact. Watering after transplanting helps to settle the soil and reduce stress on the plant.
Transplanting Methods: Trowel vs. Small Container
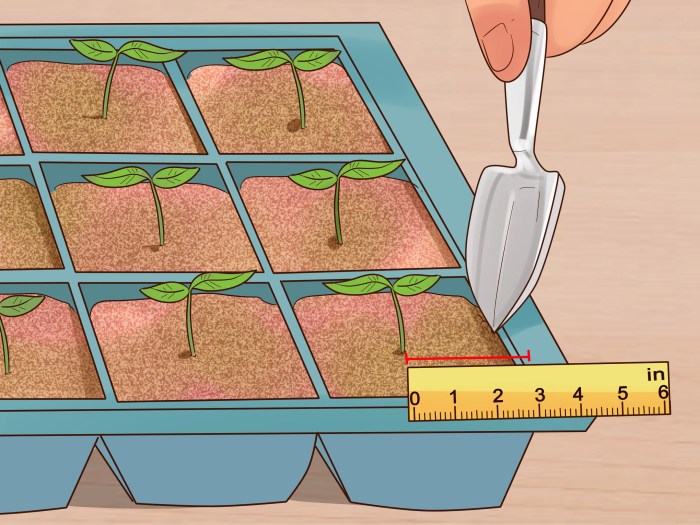
Two common methods for transplanting are using a trowel and using a small container. Using a trowel involves digging a hole slightly larger than the root ball, carefully placing the seedling in the hole, and filling the hole with soil. This method is suitable for most seedlings. Using a small container involves planting the seedling directly in its container, minimizing root disturbance.
This method is particularly useful for delicate seedlings or those with extensive root systems. Both methods require gentle handling to avoid damaging the roots, and both ensure that the seedling is planted at the appropriate depth.
Expert Answers
What should I do if my seeds don’t germinate?
Check for proper moisture levels; ensure the seeds aren’t planted too deep or in unsuitable soil. Sometimes, seed viability is low. Try again with fresh seeds.
How often should I water my seedlings?
Water consistently, keeping the soil moist but not soggy. Overwatering can lead to root rot. Adjust watering frequency based on your climate and soil type.
When is the best time to start seeds indoors?
This depends on the plant and your last frost date. Check seed packets for specific instructions; generally, start seeds 6-8 weeks before the last frost.
What are some common flower seed pests?
Aphids, slugs, and caterpillars are common pests. Use organic pest control methods like insecticidal soap or neem oil.
